How to Make WhatsApp Stickers From Photos: PNG Workflow
Learn how to turn a photo into a transparent PNG with StickerFromPhoto, then import that PNG into WhatsApp or a compatible sticker-pack app. The guide keeps image creation and pack publishing as separate steps.
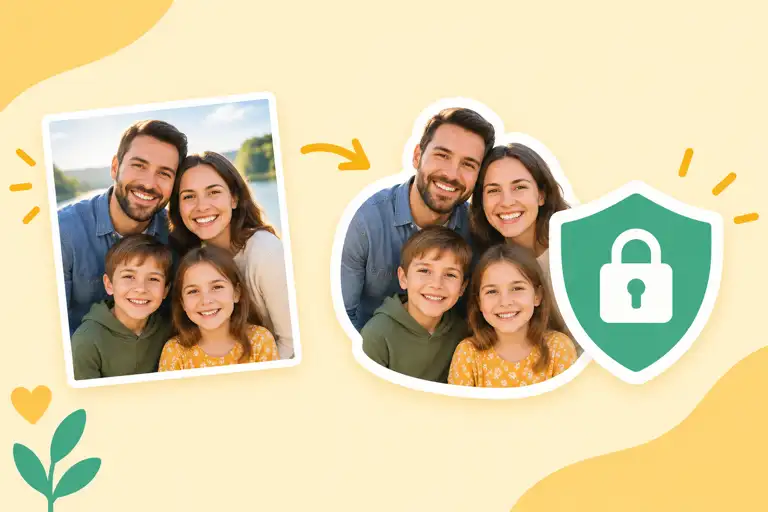
Making a WhatsApp sticker from a photo is easier when you treat it as two separate jobs. First, create a clean transparent PNG. Then import that PNG into WhatsApp or a compatible sticker-pack tool. StickerFromPhoto handles the first job: it helps you turn a photo into a downloadable PNG. WhatsApp handles the second job: adding the image to a sticker set and making it available in chats.
That distinction matters. A PNG file is not the same thing as a published WhatsApp sticker pack. If you are searching for how to make WhatsApp stickers from photos, start with the image itself. Get the crop, transparency, outline, and small-screen readability right before you worry about the app that will import it.
The workflow in plain English
- Choose a photo with a clear subject and enough detail to survive a small display.
- Use StickerFromPhoto to upload, frame, and style the image.
- Download the result as a transparent PNG and inspect the actual file.
- Use WhatsApp's current sticker tools, or a compatible sticker-pack app, to import the PNG.
- Follow the import tool's requirements for image dimensions, file size, and pack setup.
StickerFromPhoto's part ends when the PNG is downloaded. It does not publish a WhatsApp sticker pack, send the sticker to your contacts, or replace WhatsApp's own import and sharing steps.
Part 1: Create the PNG in StickerFromPhoto
Step 1: Choose a photo that survives small-screen use
Start with a photo where the subject is easy to recognize. A face, pet, object, or simple pose usually works better than a crowded group scene. You do not need a studio photograph, but you do need enough separation between the subject and the background to make the edges understandable.
Look at the photo at a much smaller size before uploading it. If the subject becomes a dark blur, the sticker will probably feel weak in a chat. Strong shapes help: a clear head-and-shoulders portrait, a bright object against a darker wall, or a pet with a readable silhouette. Tiny patterns and fine hair may disappear after the image is displayed as a sticker.
Leave a little room around the subject. A photo that is already cropped against the forehead, ears, hands, or product edges gives you less freedom when you add an outline. A modest amount of breathing room also makes the final PNG easier to place inside a sticker pack.
Step 2: Upload the photo and frame it
StickerFromPhoto accepts common image formats such as JPG, JPEG, PNG, and WEBP. Upload the clearest version you have, then use the preview to decide how much of the image should remain. The goal is not always a tight face crop. Sometimes the expression, hand gesture, or object being held is the part that makes the sticker useful.
Keep the main subject away from the extreme edges of the square canvas. WhatsApp stickers are viewed quickly, often between several lines of text. A centered subject is dependable, but an intentionally offset subject can work too when the empty side gives a gesture or caption room. Check the preview at a reduced size rather than judging it only while zoomed in.
If the original photo is wide or tall, expect the sticker composition to change as it becomes a square PNG. Decide what must stay visible before you continue. For a person, that may be the face and shoulders. For a pet, it may be the head and front paws. For an object, it may be the complete outline rather than a close-up of its label.
Step 3: Decide what “transparent” needs to mean
In this workflow, transparency describes the outside canvas around the sticker artwork. It does not automatically mean that every part of the original photo background has been perfectly removed. If your photo has an even background, the site's simple background-removal control may produce a useful result. Busy scenes, flyaway hair, fur, and similar fine details can still need manual judgment.
Turn on a transparent background when you want the sticker to sit naturally in a chat instead of appearing as a square photograph. Then inspect the edge. A transparent canvas is helpful only if the subject boundary is clean enough to read. If pieces of the wall, floor, or furniture remain attached to the subject, they may appear as odd fragments around the sticker.
There is no rule that every photo must become a perfect cutout. For some designs, a deliberately visible photo rectangle is part of the look. If you want that style, keep the background and treat the image as a square picture. If you want a typical sticker appearance, use transparency and pay closer attention to the outline.
Step 4: Clean up the edge and choose an outline
An outline gives the sticker separation from light and dark chat backgrounds. StickerFromPhoto offers outline choices such as Thin, Medium, and Thick. Use the lightest setting that makes the subject easy to see. A very heavy outline can cover small details or make a soft portrait look like a cartoon cutout.
Thin outlines often suit simple portraits and objects with a strong silhouette. Medium outlines are a practical default when the source has mixed colors. Thick outlines can help a busy or low-contrast image, but look at the eyes, fingers, whiskers, and narrow gaps before downloading. If the outline closes important gaps, reduce it.
Pay special attention to the lower edge of the subject. A leftover shadow or a strip of pavement can look like an extra object once the rest of the background is transparent. The same issue appears around glasses, hair, plant leaves, and the handles of tools or mugs. Zoom out, then zoom back in only to investigate a suspicious edge; the final decision should be based on how the sticker reads at normal chat size.
Step 5: Add text only if it stays readable
Text can turn a reaction photo into a useful sticker, but small type is easy to lose. StickerFromPhoto supports text placement options such as Top, Center, and Bottom, along with font size, color, and a soft shadow. Use short wording that adds context rather than describing the entire image.
Choose a position that does not cover the expression or the object that makes the sticker recognizable. Top text works well when the subject sits lower in the frame. Bottom text leaves a face or gesture open. Center text is usually best reserved for a very simple background or a design where the words are the main point.
Contrast matters more than decoration. Light text on a pale photo will disappear, and dark text over a black shirt will do the same. A shadow can help, but it should support the letters rather than become a second border. Read the caption from a distance. If you need to zoom in to understand it, shorten it or increase the size.
Step 6: Download and inspect the PNG
When the preview looks right, use the download control for the transparent PNG. The site's export is a 1080 × 1080 PNG, which gives you a square source file for the next stage. Save the original download instead of relying only on a screenshot of the preview; the PNG preserves transparency and gives an import tool a real image file to work with.
Open the downloaded file in an image viewer before importing it. Look for four things:
- The corners should be transparent if you selected a transparent background.
- The subject should not have accidental strips of the old background.
- Text should remain readable at a small preview size.
- The exported file should open normally and retain the square canvas.
If the corners appear white, that may be the viewer's way of showing transparency, so check the file in an editor or browser that displays a checkerboard. If the subject still has a hard-edged rectangle around it, return to the design and revisit the background setting rather than trying to fix it in WhatsApp.
Part 2: Import the PNG into WhatsApp
Now you have a sticker image, not a sticker pack. The import stage is separate. WhatsApp's available sticker features and menu wording can vary by app version, operating system, account, and region. Use the current options shown in your WhatsApp app, and follow any on-screen requirements it gives you.
Option A: Use WhatsApp's built-in sticker tools
Some current WhatsApp versions provide built-in ways to create or organize custom sticker packs. If that option appears in your sticker panel, open it and look for the control to create a pack or add a custom sticker. Select the PNG you downloaded from StickerFromPhoto, preview it, and confirm the pack or sticker according to the prompts.
The exact path may not look the same on Android, iPhone, desktop, or web. Do not treat an older tutorial's button names as fixed instructions. If the built-in tool asks you to crop, resize, or confirm a file type, accept those requirements as part of WhatsApp's import process. StickerFromPhoto has already completed its job at this point.
After adding the image, open a chat or the sticker picker and test it. Check the sticker against both light and dark areas of the conversation. A transparent PNG that looked fine on a white preview may need a stronger outline when used in a dark theme. If you edit the source, make the change in StickerFromPhoto, download a new PNG, and import the new file rather than expecting WhatsApp to update the old image automatically.
Option B: Use a compatible sticker-pack app
If the built-in option is not available on your device, a compatible sticker-pack app may provide the missing pack-creation step. Choose one that you trust, review its permissions and current requirements, and use its documented import flow. These apps commonly ask you to create a pack, add one or more image files, name the pack, and then send or add the pack to WhatsApp.
That app is responsible for packaging the images and handing the pack to WhatsApp. StickerFromPhoto is not responsible for that handoff. The app may also require a particular canvas size, a maximum file size, or extra pack artwork. Those limits belong to the importer and can change, so follow the instructions displayed by the version you install instead of assuming that every third-party app works the same way.
Before granting access to your photo library or contacts, read the app's privacy details. A sticker tool should not need more access than its import and sharing features require. If an app asks you to upload personal photos to an unfamiliar service, pause and choose a different workflow.
Common problems and practical fixes
The PNG has a white square background. Reopen the file and verify whether the corners are truly transparent. If they are opaque, return to StickerFromPhoto and enable the transparent background option. Do not assume that a checkerboard-looking preview means the exported file is transparent; verify the downloaded file itself.
The subject has a halo. Reduce the outline width or revisit the background edge. A pale fringe often comes from the old background, while a dark fringe may come from an outline that is too strong for the image. Compare the sticker on a light and a dark chat background.
The photo looks good, but the sticker is hard to recognize. Simplify the crop. Keep the face, gesture, or main object larger in the square frame. Remove text that competes with the subject. Stickers are usually seen for a moment, so a clear shape beats a detailed scene.
The text disappears in WhatsApp. Use fewer words, increase the size, or move the caption away from a busy part of the photo. Test the final PNG at roughly the size it will appear in the sticker picker, not only at the full 1080 × 1080 resolution.
The importer rejects the file. Read the importer's error message and requirements. It may need a different image size, compression level, or supported format. Keep the downloaded PNG as your master, then make a copy for any resizing or optimization the importer requests. That keeps your StickerFromPhoto version available for another export.
I cannot find the pack after adding it. Confirm that the importer finished its add-to-WhatsApp step, then close and reopen the sticker picker. Check the pack's name and whether the app reports an error. If the feature is missing from your WhatsApp version, the limitation is in the import or pack-publishing stage, not in the PNG creation stage.
Final checklist
- The photo has one recognizable subject.
- The square composition leaves enough room around the edge.
- Transparency is intentional and has been checked in the downloaded file.
- The outline improves contrast without covering important details.
- Any caption is short and readable at chat size.
- The final asset is saved as a real PNG, not a screenshot.
- WhatsApp or a compatible sticker-pack app has handled the import and sharing step.
The reliable order is simple: make the PNG first, inspect it, then import it. StickerFromPhoto gives you the image file and its visual treatment. WhatsApp, or the compatible pack tool you choose, determines how that file becomes part of a sticker pack and how it is shared.