How to Make Stickers Without Photoshop or Design Software
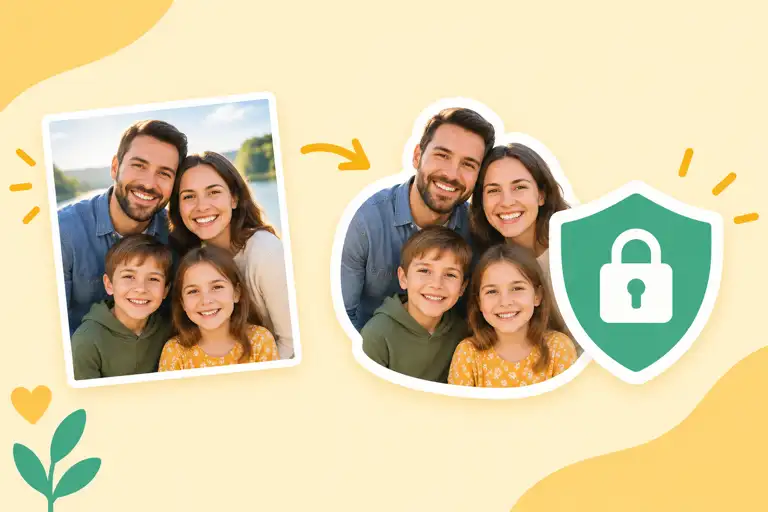
You do not need Photoshop to make a useful sticker. This browser-first guide walks through uploading a photo, adjusting the crop and outline, adding text, and downloading a transparent PNG.
Making a sticker used to mean opening Photoshop, finding a background-removal tutorial, and learning enough layers and masks to get lost in the file. That is still a good route for illustration work, but it is unnecessary for a quick photo sticker. A browser editor can handle the parts most people actually need: upload a picture, frame the subject, add an outline, place a short caption, and export a PNG.
This guide explains a simple workflow with StickerFromPhoto. It is aimed at digital stickers for messages, profile images, journals, classroom materials, and small personal projects. It does not require a subscription to a desktop design suite, and you can do the work on a laptop, tablet, or phone with a modern browser.
Do you need Photoshop to make stickers?
No. You need an image editor that can import a photo, let you adjust its framing, draw a visible edge around the subject, and save the result in a format you can use. A browser tool covers that basic job without asking you to manage layers or install a large application.
Photoshop becomes useful when the sticker is part of a larger illustration or brand system. You might need detailed pen-tool paths, precise color correction, vector artwork, custom brushes, CMYK preparation, or a production cut line for a printer. Those are real reasons to use desktop software. They are not requirements for turning a holiday photo, pet picture, or selfie into a clean digital sticker.
There is one distinction worth keeping clear: a visual outline is not the same as a physical die-cut path. StickerFromPhoto adds a stroke to the image. If a print shop asks for a contour cut file, ask what format and bleed settings it needs and use a production-oriented app for that final step.
Browser tool or desktop software?
A browser editor is the quickest choice when you want one sticker or a small batch. There is no setup, the controls are easy to find, and the finished file is ready to download from the same screen. It also works well when you are moving between devices or helping someone who does not use design software.
Desktop software gives you more control and repeatability. You can keep a layered source file, save reusable templates, batch-process a large set of images, and fine-tune edges by hand. The trade-off is time. You must install the app, learn its terminology, and make more decisions before you see a usable result.
For most photo stickers, start in the browser. Move to a desktop editor only when the preview shows an edge problem the simple controls cannot fix, or when the project has print or branding requirements.
What to prepare before you start
Choose a sharp source image with one obvious subject. A person, pet, food item, or object should be large enough to recognize in a square preview. Good light helps the outline read cleanly. A busy background is not a deal-breaker, but it can make a simple background-removal mask less reliable.
StickerFromPhoto accepts JPG, JPEG, PNG, and WEBP files up to 15 MB. If your image is much larger, resize a copy first. Keep the original untouched so you can try a different crop later. Decide whether the sticker needs a transparent outside area or a solid color behind it. Transparent is usually the most flexible choice for chats and layouts; a solid background can make a deliberately square badge.
Step 1: Upload the photo
Open StickerFromPhoto and choose the upload control. Select the image from your device and wait for the preview to appear. The editor works locally in the browser for the main image adjustments, so a slow connection should not prevent you from testing the design once the page has loaded.
Give the preview a quick quality check. If the subject is soft, cut off, or hidden behind another object, go back to the original photo and choose a better frame. It is faster to replace a weak source now than to spend time compensating with an outline or text.
Step 2: Frame and adjust the image
Use the crop or position controls to keep the subject inside the square canvas. Leave a little breathing room around hair, ears, hands, or other details that should remain visible. A sticker that touches the edge can feel cramped, especially after you add a thick outline.
Check the scale at the size where you will use the sticker. Details that look obvious at full browser size may disappear in a chat list or a small print. If the subject needs to be moved, center it first, then make small position changes. Avoid constant zooming in and out; the square live preview is the best judge of the final balance.
If the editor offers a Remove Background option, treat it as a convenience for fairly even backgrounds, not as a guaranteed cutout. Look closely at hair, fur, fingers, and thin objects. A clean original photo with contrast between subject and background will usually produce the most believable edge.
Step 3: Pick a background
Choose Transparent when you want the sticker to sit on a message, document, or colored page without a rectangular box. The transparent setting controls the exported canvas; it does not automatically erase every pixel behind the subject. If you want a simple color field, choose a solid background that contrasts with the subject and the outline.
White and black are useful starting points, but they are not always the most readable. A pale photo may need a darker edge and background. A dark subject often benefits from a white or light outline. Judge the combination in the preview instead of relying on the color swatch alone.
Step 4: Add an outline
An outline separates the photo from whatever sits behind it. Start with Medium, which is 28 px on the 1080 x 1080 canvas. Thin is 16 px and works when the image already has strong contrast. Thick is 44 px and is easier to see in small previews or on a complicated background.
Pick a color that makes the edge easy to scan. White is a common choice for dark images; black or charcoal can work better around pale images. If the outline looks like it is swallowing small details, reduce the width before changing the photo. If the sticker disappears into its background, increase the width or switch to a higher-contrast color.
Do not confuse the outline with a print cut line. The downloaded PNG contains the visible stroke you see in the editor. It does not contain a separate vector path for a cutting machine.
Step 5: Add short text
Text is optional, but a short word can turn a photo into a reaction sticker or label. Keep it brief: "Nice!", "Monday," a name, or a simple sound effect is easier to read than a sentence. Use Top, Center, or Bottom placement and check that the text does not cover the face or the detail that makes the image recognizable.
Adjust the font size until the letters hold together at thumbnail size. Choose a text color with enough contrast, then enable a soft shadow if the letters blend into the photo. A little empty space around the caption helps more than adding extra effects. If the sticker will be used in a dark chat, preview it against a dark surface before downloading.
Step 6: Inspect the live preview
Pause before exporting. Look at the outside edge first: are there leftover background patches, jagged hair, or a halo from the mask? Then look at the composition: is the subject centered, is the outline even, and can you read the caption without zooming in? Finally, switch between the transparent and solid-background views if available. A design can look fine on white and fail on a colored page.
Make one change at a time. If the edge is wrong, adjust the source framing or background setting. If the subject feels too small, change the scale. If the words compete with the photo, move or shorten them. Small, deliberate changes are easier to evaluate than a handful of sliders moved together.
Step 7: Download a PNG
When the preview looks right, choose Download Transparent PNG for a sticker with clear outside pixels. Choose the regular Download PNG option when you want the current solid background included. PNG is the practical choice because it preserves sharp edges and can store transparency; JPG will flatten the transparent areas into a background.
The editor uses a 1080 x 1080 canvas, which is large enough for most digital sticker uses and still easy to share. Open the downloaded file once to confirm that it saved correctly. On a computer, the file usually appears in Downloads. On a phone or tablet, check the browser download list or Files app. If transparency looks black or white in a preview app, test the PNG on a colored page before assuming the file is broken. Some viewers show a temporary checkerboard or a solid preview even when the alpha channel is present.
When a desktop editor is worth the extra work
Use Photoshop, Affinity Photo, GIMP, or another desktop editor when you need a hand-drawn cutout, several layers, custom typography, color matching across a sticker set, or print-ready files. Those tools let you refine an edge pixel by pixel and keep an editable source file. They are also better for a repeatable template with fixed logo placement and type styles.
You can still use the browser workflow as a first draft. Make the composition and caption there, download a PNG, and bring that file into the desktop app for detailed cleanup. This keeps the early decisions quick and reserves the slower work for stickers that actually need it.
Common problems and quick fixes
The subject has a white halo: Reduce the outline width, choose a darker edge, or start with a photo that has more contrast around the subject.
Hair or fur looks clipped: Try a different source photo or a gentler background setting. Simple masks struggle with fine strands and similar colors.
The text is hard to read: Shorten it, move it into open space, increase the size slightly, or turn on the soft shadow.
The downloaded file has a rectangle: Confirm that Transparent is selected and use Download Transparent PNG. A JPG export cannot retain transparency.
The sticker feels tiny: Reframe the subject so it occupies more of the square while keeping a narrow margin for the outline.
Final checklist
Before sharing the file, confirm four things: the subject is clear at thumbnail size, the outline separates it from the background, the caption is readable, and the file type matches the job. For a quick digital sticker, that is enough. You can make a polished result without Photoshop, a design degree, or a complicated layer stack. Start with a good photo, keep the adjustments modest, and let the square preview tell you when the sticker is finished.