How to Make Selfie Stickers From Your Photos with StickerFromPhoto
Learn how to turn a clear selfie into a digital 1080 x 1080 PNG sticker with StickerFromPhoto. This guide covers photo choice, square face framing, expression selection through source photos, the limits of the local background mask, text placement, outline width, and examples for profile and chat reaction stickers.
Make a selfie sticker from a photo
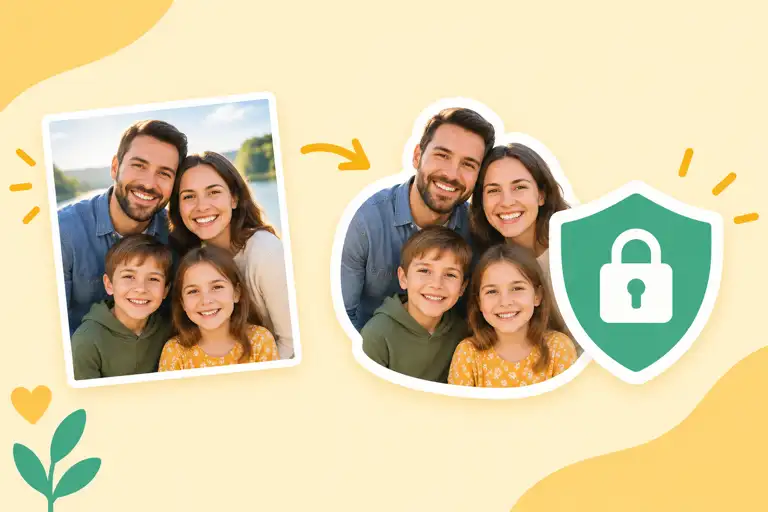
StickerFromPhoto turns a photo into a square digital sticker in your browser. Upload a JPG, JPEG, PNG, or WEBP image up to 15 MB, review the Live preview, choose Transparent or Solid color, add an outline, optionally add text, and export a 1080 x 1080 PNG. The result is a digital file for profile graphics, chats, journals, or layered designs, not a physical sticker order.
Choose a selfie that reads clearly
Start with a sharp selfie where one face is easy to recognize. Face the camera or use a clear side profile, keep the eyes and important hair details away from the photo edges, and choose even lighting when possible. A simple background makes the edge easier to inspect in the square preview.
- Use one main face instead of a crowded group selfie when the sticker is meant to represent one person.
- Leave space above the hair and around the chin so the square composition does not feel cramped.
- Pick an expression that matches the intended use: a neutral smile for a profile sticker, or a clearly readable reaction for chat.
- Keep the original file if you plan to make several versions from the same selfie.
The editor accepts JPG, JPEG, PNG, and WEBP files up to 15 MB and fits the image into a 1080 x 1080 square canvas.
Face cropping and expression choices
The current editor does not provide a separate face-detection crop tool or an expression picker. Face cropping in this workflow means choosing a suitable selfie, leaving enough room around the face, and checking how the square canvas frames it in Live preview. Expression selection also happens before upload: make a small set of source photos with distinct expressions, then create one sticker from each photo.
After uploading, inspect the face near every edge of the square. If the forehead, chin, hair, or shoulders feel cut off, return to a wider source photo and upload it again. For a more precise face cutout, prepare a transparent cutout in another editor first. The site’s optional Remove Background control is a simple local mask for fairly even backgrounds; it is not an AI face or hair cutout.
Step-by-step selfie sticker workflow
01 Upload a source photo
Open the photo sticker maker and use Upload a photo to choose a clear selfie. The selected image is processed locally in the browser.
02 Check the square framing
Inspect Live preview on the 1080 x 1080 canvas. Keep the face, hair, and any shoulder detail you want inside the composition. There is no separate face-crop handle, so use a better-framed source image if needed.
03 Choose the background
Select Transparent when the sticker will sit on different chat colors or designs. Select Solid color when the square background should remain part of the PNG, then choose a Background color.
04 Decide whether to try Remove Background
Use the control only when the selfie has a fairly even background, then inspect hair and face edges. Undo it or use a prepared cutout if the mask removes part of the subject.
05 Add text and place it
Enter a short line in Text (optional), set the font size and text color, and choose Top, Center, or Bottom. Enable Soft shadow when the words need more separation from the photo.
06 Choose the outline and export
Compare Thin, Medium, and Thick in the preview, set Outline color, then click Download Transparent PNG or Download PNG according to the selected background mode.
Text position and outline width
Text works best when it supports the expression without covering the eyes or mouth. Use Top for a short greeting above the face, Center for a compact reaction word when the face has room, and Bottom for a caption under the chin. Keep the message short and verify it at the size where the sticker will actually appear.
| Setting | How to use it for selfies |
|---|---|
| Thin (16 px) | A lighter edge for a clean profile portrait or a selfie with strong contrast. |
| Medium (28 px) | A balanced starting point for most profile and chat stickers. |
| Thick (44 px) | Stronger separation for small chat previews, busy backgrounds, or a pale face on a light surface. |
| Outline color | Choose a color that contrasts with both the face edge and the surface behind the PNG. White often reads well on dark chats; charcoal or another dark accent can separate a pale selfie on a light page. |
These are preset outline choices on the current editor, not a freehand width slider. Preview the selfie at its final display size before downloading.
Examples for real selfie stickers
Profile avatar sticker
Choose a well-lit smiling selfie with space around the head. Keep Transparent, start with Thin or Medium, leave text off, and check the face against both light and dark backgrounds.
Chat reaction set
Prepare separate photos with readable reactions such as a smile, surprise, or tired expression. Create one sticker per photo, use the same Medium outline color, and add a short word at Top or Bottom when the expression needs context.
Square social graphic
Use a selfie with a simple background, select Solid color, choose an accent Background color, add a short caption at Bottom, and compare Medium with Thick before downloading the PNG.
Common questions
Can I crop only the face in the editor?
The current workflow has no separate face-detection crop control. Use a well-framed source selfie, check the square Live preview, or prepare a crop in another editor before uploading.
How do I choose a facial expression?
There is no expression picker. Choose different source selfies with the expressions you want, then make one sticker from each photo.
Where can I place text?
Text (optional) supports Top, Center, and Bottom positions. You can also adjust font size and text color and enable Soft shadow.
Which outline width should I use?
Start with Medium (28 px). Thin is 16 px and suits a cleaner edge; Thick is 44 px and gives stronger separation for small previews or busy images.
Does Transparent remove the selfie background?
No. Transparent controls the exported canvas background. Remove Background is a simple local mask for fairly even backgrounds, not an AI face or hair cutout.
Final selfie sticker check
Before downloading, confirm that the face is comfortably inside the square, the chosen expression is readable, text does not cover key features, and the outline remains visible on the destination background. Choose Download Transparent PNG when the sticker must sit over other surfaces; choose Download PNG for a complete Solid color tile.
Open StickerFromPhoto to try the workflow in your browser.