How to Make Pet Stickers From Photos with Create Sticker from Photo
Learn how to turn a clear cat or dog photo into a digital 1080 × 1080 PNG sticker with Create Sticker from Photo. This guide covers photo choice, subject framing, fur edges, outlines, backgrounds, and before-and-after checks.
Make a digital pet sticker from a photo
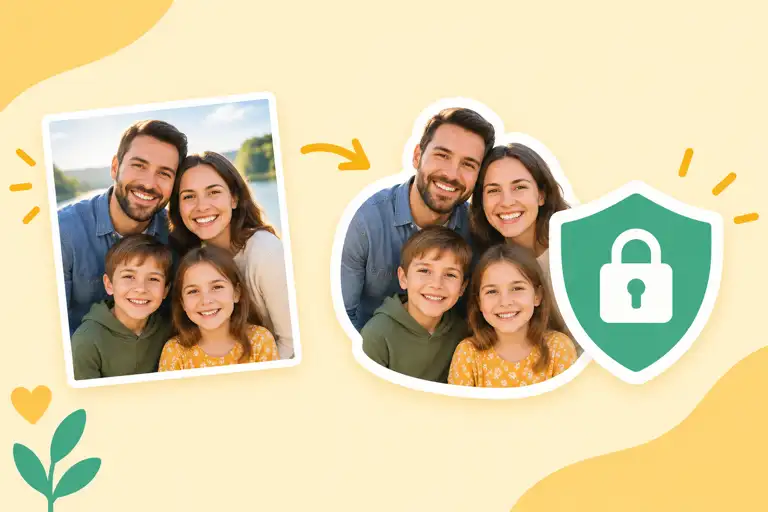
Create Sticker from Photo turns a cat or dog photo into a square digital sticker in your browser. Upload a JPG, JPEG, PNG, or WEBP image, check the live preview, choose Transparent or Solid color, add an outline, and export a 1080 × 1080 PNG. The result is a digital file for chats, journals, social graphics, or layered designs, not a physical sticker order.
1. Choose the right cat or dog photo
Start with a sharp image where the pet is easy to recognize. A front-facing portrait, a clear side profile, or one expressive pose works better than a distant group shot. Good light helps the fur colors separate from the background, and a simple wall, floor, or outdoor background makes the edge easier to inspect.
- Keep the eyes, ears, paws, and tail inside the frame; do not place important details against the very edge.
- Choose one main pet and crop out distracting people, toys, or duplicate animals when possible.
- Use enough resolution for the square preview. The upload area accepts JPG, JPEG, PNG, and WEBP files up to 15 MB.
- For long-haired pets, prefer even lighting and a background that is a different color from the fur.
The editor fits the photo into a 1080 × 1080 square canvas. Leave visual breathing room around the pet so the ears, whiskers, and tail do not feel cramped after the square composition.
2. Upload, frame, and pick a background
Open the photo sticker maker and use Upload a photo. Inspect the Live preview before changing the style. If the sticker will be placed over different chat colors or a design, select Transparent under Background. If the square background should stay part of the artwork, select Solid color and choose a Background color.
Transparent controls the exported canvas pixels; it does not automatically create a perfect fur cutout. A room, grass, or sofa in the original photo can remain visible. When a precise silhouette matters, prepare a cleaned cutout in another editor first, then bring the PNG back to this tool for the sticker finish.
3. Handle fur edges and add a readable outline
Use Remove Background only as a simple local mask for a pet photographed against a fairly even background. It is not an AI cutout tool, so zoom in on whiskers, curls, loose fur, paws, and the gap between legs. If fur disappears or the background cuts into the body, undo the mask or start from a cleaner image.
Under Outline thickness, compare Thin (16 px), Medium (28 px), and Thick (44 px) on the 1080 × 1080 canvas. Medium is a balanced starting point for most pet portraits. Thin preserves more fine detail when the photo already has contrast; Thick gives stronger separation when the preview will be small or the background is busy. Set Outline color to contrast with both the pet and the surface underneath the PNG. White is often clear on dark backgrounds, while charcoal or another dark accent can separate a pale dog or cat from a light page.
Cat photo: before and after comparison
Before: original cat photo
A close portrait shows the cat sitting on a patterned sofa. The ears and whiskers are visible, but the busy fabric competes with the fur edge. The subject is kept inside the square frame with space above the ears.
After: digital PNG sticker
Upload the photo, select Transparent, compare Medium and Thick, and choose a light outline if the cat is placed on a dark chat. The downloaded 1080 × 1080 PNG keeps the chosen outline and any remaining sofa pixels; it is ready to place on another digital surface.
Dog photo: before and after comparison
Before: original dog photo
A side-profile dog photo has pale fur against a bright yard. The nose and tail are near the frame edge, so the image is reframed before export and the outline color is tested on a light background.
After: digital PNG sticker
Choose Transparent, try a Medium or Thick dark outline, and inspect the fur boundary in the Live preview. The final PNG is a digital sticker with the selected square canvas and visible outline, not a printed or die-cut product.
4. Add optional text and export
If the pet sticker needs context, enter a short line in Text (optional). The editor provides font size, text color, Top, Center, and Bottom positions, plus Soft shadow. Keep the message brief so it remains readable beside the pet at chat size. Check the preview on the background where it will be used, then click Download Transparent PNG for transparent pixels or Download PNG when using Solid color.
| Setting | Practical pet-sticker choice |
|---|---|
| Background | Transparent for layered use; Solid color for a complete square tile. |
| Outline | Medium first, then Thin for detail or Thick for stronger separation. |
| Text | Optional; use a short caption and verify its position in the preview. |
| Output | A 1080 × 1080 PNG. Transparent PNG preserves clear outside pixels. |
Common questions
Does Transparent remove the whole photo background?
No. It controls the exported canvas background. Remove Background is a simple local mask for fairly even backgrounds, so detailed fur may need preparation in another editor.
Which outline thickness should I use for a pet?
Start with Medium (28 px). Use Thin (16 px) when the pet already contrasts with its background, or Thick (44 px) when the sticker will be small or the image is busy.
What files can I upload?
The upload workflow accepts JPG, JPEG, PNG, and WEBP images up to 15 MB.
What do I download?
The editor exports a 1080 × 1080 PNG. Choose Download Transparent PNG when the area outside the sticker should remain transparent; use Download PNG for the current solid-background design.
Is this a physical printed sticker?
No. StickerFromPhoto creates a digital PNG file. A visible outline in the image is not a separate print or die-cut path.
Final check before sharing
Review the cat or dog at the actual size where it will appear, check the fur edge and outline against both light and dark surfaces, confirm the text is readable, and open the downloaded PNG to verify transparency. This keeps the result clearly digital and avoids mistaking the decorative outline for a manufacturing cut line.
Open Create Sticker from Photo to try the workflow.